Creating a Customer
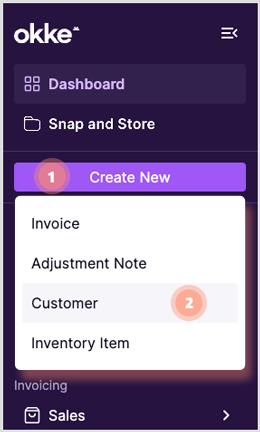
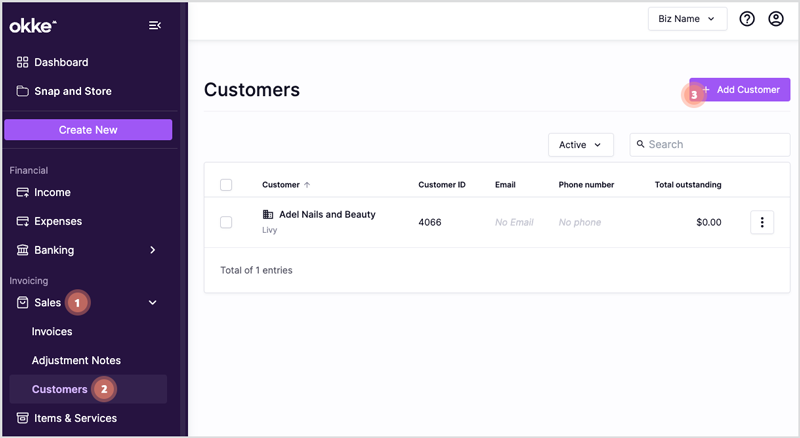
Create a new Customer by clicking Create New +, selecting Customer, filling in the relevant fields, and saving everything by selecting Add Customer.
Video Walkthrough
There are two ways to begin adding a new Customer:
Fill in the relevant fields with your Customer’s details.
- Click on Create New + in the sidebar on the left side of the screen, then select Customer.
- Or, click the Sales drop-down menu on the left side of the screen, select Customers, and then + Add Customer in the top right.
1. Customer Code: This is a unique identifier for this Customer.
2. Customer Type: Using this dropdown menu you can assign the Customer a 'Customer Type'. Customer Types are used to set different prices for different Customers (for example, cheaper prices for wholesale customers or friends & family). Read our article on Setting up Customer Groups for more information on Customer Groups.
3. (Optional) Business Details: You can create business details that will appear on invoices and other relevant documents.
4. (Optional) Address: You have the option of storing a different postal and physical address.
5. Contact: Enter the contact details of your customer. You can expand the Contact section to add more fields (for example, primary phone, alternate phone and fax).
Note: if you are selling to an individual, you have the flexibility of being able to create a Customer with as little as just a contact name and customer code.
6. Once you’re done, select Add Customer in the bottom right.